Instrument 04

Innovate Anywhere

Real science, radically accessible. Every guide lists honest cost, safety tier, materials with alternatives, and vetted kit sources. Green = safe at home, yellow = handle carefully, red = educational only.

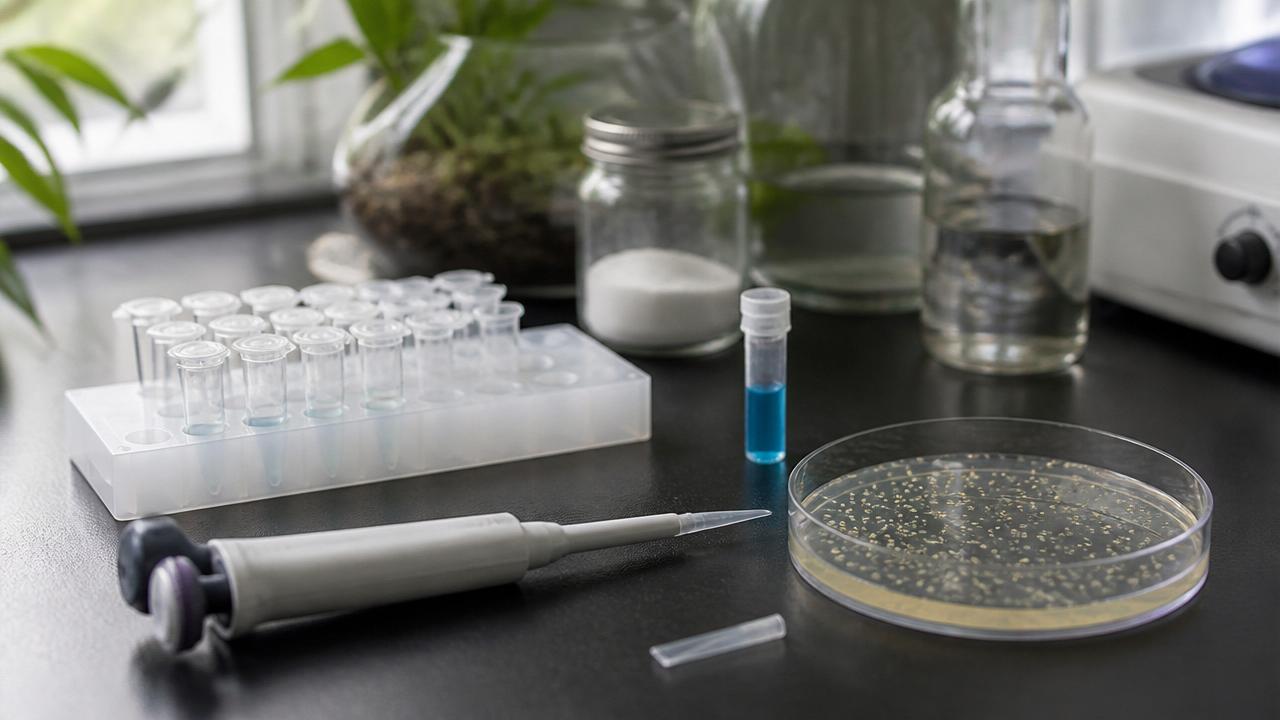
Edit a plant gene with CRISPR-Cas9 — reference photo of equipment and materials
Handle carefully
Genetic engineering ≈ $169 1 weekend + growth time

Edit a plant gene with CRISPR-Cas9

Follow a beginner biotech kit to knock out a pigment gene in yeast or Arabidopsis and see the phenotype yourself. The most approachable entry point into real molecular biology.

Materials & alternatives

  • Competent cells

    • Non-pathogenic E. coli (kit-supplied)
    • Bakers yeast S. cerevisiae (edible-grade)
  • Cas9 + gRNA plasmid

    Pre-assembled in beginner kits targeting a known pigment or auxotrophy locus.

  • Selection media

    • LB agar + kanamycin
    • LB agar + ampicillin
    • YPD agar + G418 for yeast
  • Sterilization

    • 70% isopropanol
    • 70% ethanol
    • Alcohol wipes
  • Micropipette + sterile tips (P200 or P1000)

  • Water bath or sous-vide at 42 °C

    For the heat-shock transformation step.

  • Ice bucket (any small cooler)

Steps

  1. 01

    Order a beginner CRISPR kit. It ships with a guide RNA targeting a known gene, Cas9-expressing plasmid, competent cells, and selection media.

    A typical kit — competent cells, plasmid, and selection reagents.
    A typical kit — competent cells, plasmid, and selection reagents.
  2. 02

    Sterilize your workspace with 70% ethanol. Prepare LB agar plates with the included antibiotic and let them solidify.

  3. 03

    Transform competent cells with the Cas9 + gRNA plasmid using the heat-shock protocol (30 min ice → 42 °C for 30 s → 2 min ice → recovery).
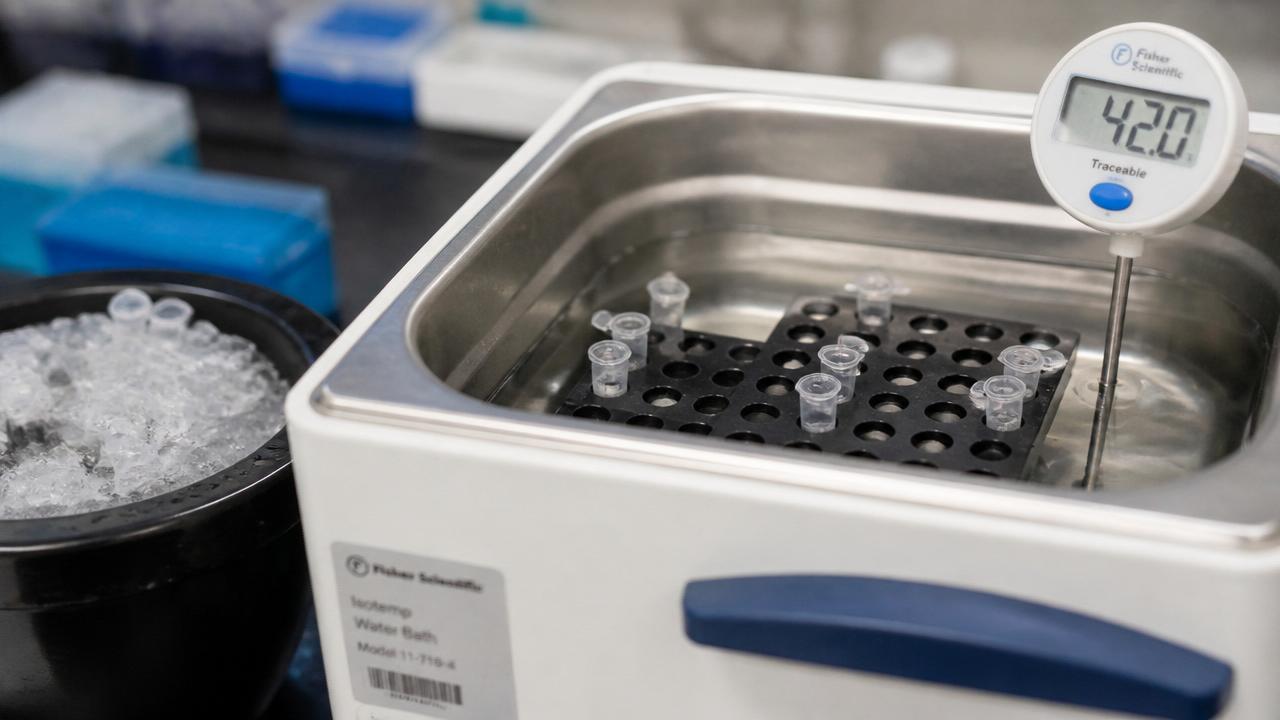
    42 °C water bath and ice bucket — the classic heat-shock setup.
    42 °C water bath and ice bucket — the classic heat-shock setup.
  4. 04

    Plate on selection media and incubate 24–48 hours. Only cells that took up the plasmid grow.

  5. 05

    Sequence a colony (mail it to a service like Plasmidsaurus for ~$15) to confirm the edit at the target locus.

  6. 06

    Optional: use the kit's yeast/plant protocol to reproduce a visible phenotype (e.g. white vs pigmented colonies).

Safety note

Non-pathogenic organisms and low-toxicity reagents. Follow the kit's biosafety guide, dispose of transformed organisms as instructed, and never work on pathogens outside a licensed lab.
Amplify your own DNA with an open-source thermocycler — reference photo of equipment and materials
Safe
Molecular biology ≈ $85 kit (used) or $599 new 3–4 hours

Amplify your own DNA with an open-source thermocycler

Build or buy an OpenPCR thermocycler and run polymerase chain reaction on your own cheek-swab DNA. The same technique behind COVID tests and CSI.

Materials & alternatives

  • Thermocycler

    • OpenPCR kit (assembled)
    • Off-lease Bio-Rad MJ Mini (eBay ~$75–150)
    • MiniPCR bio mini16
  • DNA polymerase master mix (2×)

    • NEB OneTaq
    • NEB Q5 (high fidelity)
    • Promega GoTaq
  • Primer pair

    For a well-characterized locus — mtDNA HV1 or human β-globin work well.

  • Template DNA source

    • Cheek swab + Chelex-100 prep
    • Spin-column kit (Qiagen DNeasy)
    • Saliva Oragene tube
  • PCR tubes, thin-walled 0.2 mL

  • Micropipettes (P10 + P200) + filter tips

  • Nuclease-free water

Steps

  1. 01

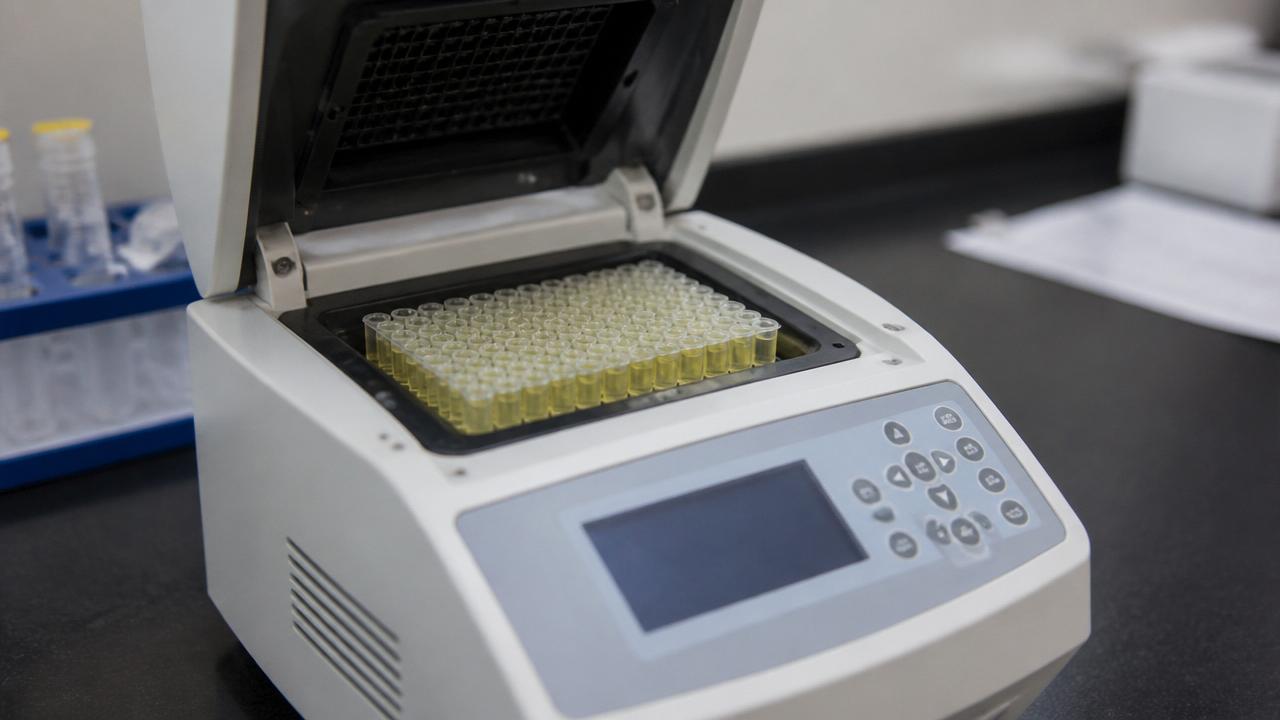
    Assemble the OpenPCR kit, or source an off-lease benchtop thermocycler from eBay (often $75–150).

    Desktop PCR thermocycler with a 96-well reaction plate loaded.
    Desktop PCR thermocycler with a 96-well reaction plate loaded.
  2. 02

    Collect cheek cells with a swab, extract DNA using a $15 Chelex or spin-column kit.

  3. 03

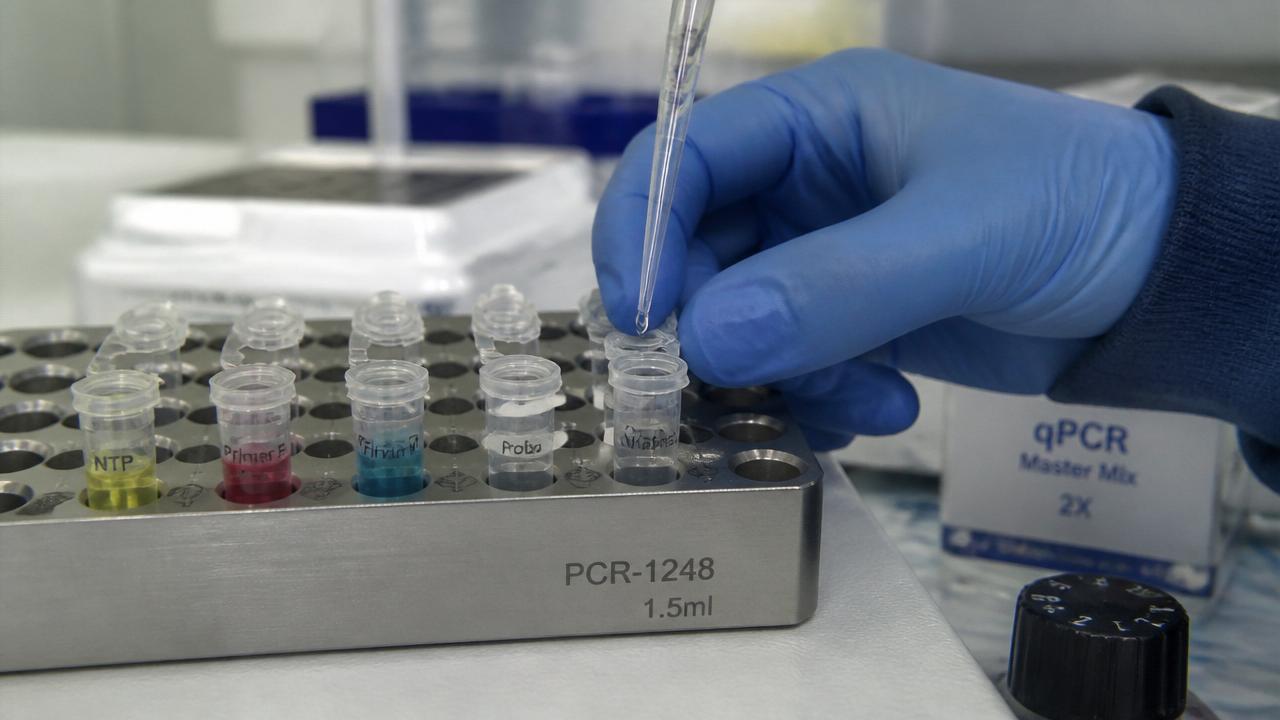
    Prepare a 25 µL PCR mix: master mix (2×), primers, template DNA, and nuclease-free water. Keep tubes on ice while pipetting.

    Assembling a PCR reaction on a cold-block — one reagent at a time.
    Assembling a PCR reaction on a cold-block — one reagent at a time.
  4. 04

    Run the cycle: 95 °C denaturation, 55 °C annealing, 72 °C extension, ~30 cycles.

  5. 05

    Run the product on a gel (see the gel electrophoresis tutorial) to see your band around ~440 bp.

Safety note

No hazardous reagents once assembled. Ethidium bromide alternatives (GelRed, SYBR Safe) are non-mutagenic — never use EtBr at home.

Further reading

Build a $30 gel electrophoresis rig — reference photo of equipment and materials
Handle carefully
Molecular biology ≈ $30–60 2 hours build, 45 min run

Build a $30 gel electrophoresis rig

Separate DNA fragments by size with a Tupperware container, some agarose, and a 9V battery bank. Visualize with a UV torch or blue-light box.

Materials & alternatives

  • Gel chamber

    • Small clear food-storage container (~5 × 10 cm)
    • 3D-printed Pearl Biotech gel box
    • Repurposed acrylic box
  • Electrodes

    • Stainless-steel paperclips
    • Platinum wire (best, ~$8)
    • Graphite pencil leads
  • Power source

    • 9V battery + snap connector
    • Stack of 4× 9V batteries (36 V) for faster runs
    • Benchtop 30 V DC supply
  • Agarose powder

    Molecular-biology grade — kitchen agar-agar will NOT work.

  • Running buffer

    • 1× TAE (Tris-acetate-EDTA)
    • 1× TBE (Tris-borate-EDTA)
  • DNA stain

    • GelRed (safest)
    • SYBR Safe
    • Methylene blue (visible without UV)
  • Loading dye (bromophenol blue / xylene cyanol)

  • Illumination

    • Blue-light transilluminator + orange filter (~$12)
    • UV torch 302 nm + amber goggles

Steps

  1. 01

    Get a small food-storage container (~5 × 10 cm), two stainless steel electrodes (paperclips work), and a 9V battery clip.

  2. 02

    Cast a 1% agarose gel: 1 g agarose in 100 mL TAE buffer, microwave until clear, cool, pour into a smaller mold with a well comb.

  3. 03

    Once set, place the gel in the container, fill with TAE buffer until the gel is covered.

  4. 04

    Load samples mixed with loading dye and a stain (GelRed).

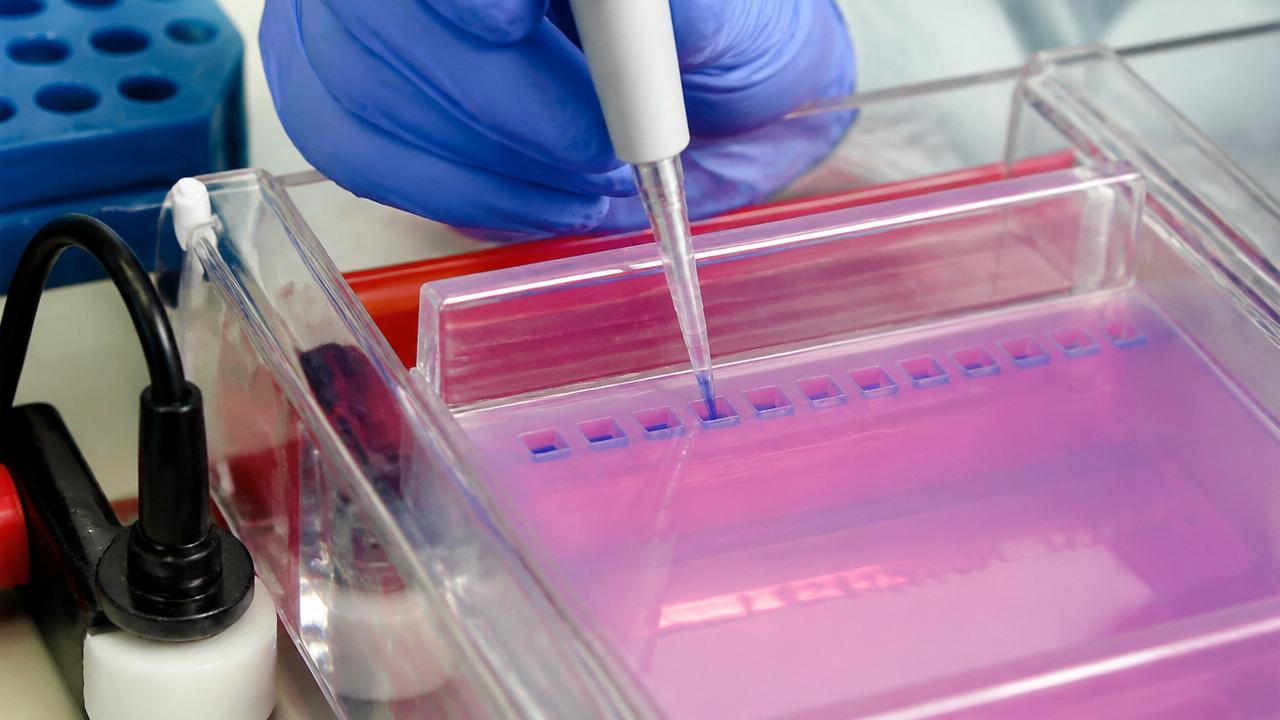
    Loading a sample with a micropipette — steady hand, tip just above the well.
    Loading a sample with a micropipette — steady hand, tip just above the well.
  5. 05

    Connect the battery clip so cathode is at the wells end. Run for 30–45 minutes until dye front is 2/3 down the gel.

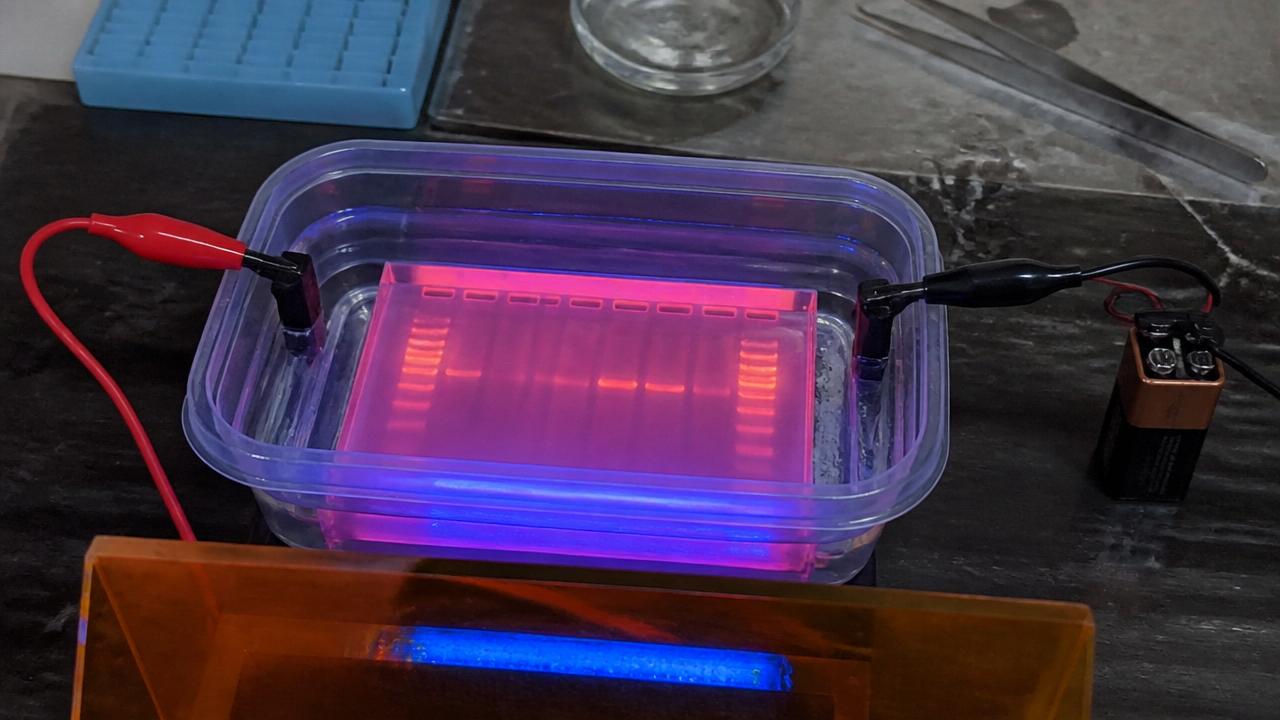
    DIY gel box mid-run — blue-light transilluminator revealing DNA bands.
    DIY gel box mid-run — blue-light transilluminator revealing DNA bands.
  6. 06

    Illuminate with a $12 blue-light transilluminator through an orange filter to see bands.

Safety note

Low-voltage DC is safe, but never scale up to mains voltage without proper hardware. Wear gloves — DNA stains are usually safe but some (avoid EtBr) are mutagenic.

Build a heart-rate and SpO₂ biosensor — reference photo of equipment and materials
Safe
Wearable biosensing ≈ $25 2 hours

Build a heart-rate and SpO₂ biosensor

Read your own pulse waveform and blood oxygen with a $10 MAX30102 module on an Arduino. Plot in real-time on a laptop.

Materials & alternatives

  • Microcontroller

    • Arduino Nano (~$8)
    • Arduino Uno R3
    • ESP32 dev board (WiFi/BLE built-in)
    • Raspberry Pi Pico
  • Pulse-oximetry breakout

    • MAX30102 (SparkFun, ~$6)
    • MAX30105 (particle sensing too)
    • MAX86141 (research-grade)
  • Half-size breadboard

  • Jumper wires (male-male, 4 colors minimum)

  • USB cable to match your microcontroller (Mini-B / Micro-B / USB-C)

  • Optional battery

    • 3.7 V LiPo + TP4056 charger
    • AA battery pack (3× cells)

Steps

  1. 01

    Buy: Arduino Nano ($8), MAX30102 pulse oximetry breakout ($6), jumper wires, USB cable.

  2. 02

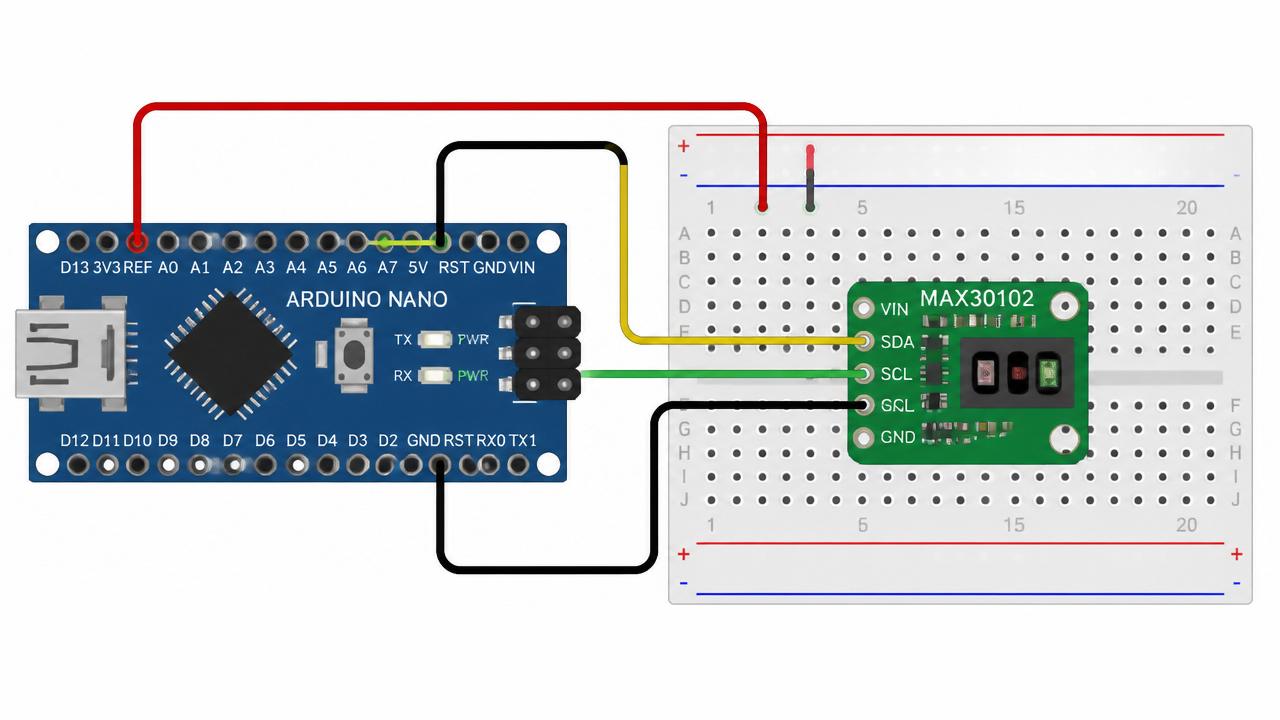
    Wire I²C: SDA→A4, SCL→A5, VIN→3.3V, GND→GND.

    Fritzing-style wiring diagram — colored wires match the physical build.
    Fritzing-style wiring diagram — colored wires match the physical build.
  3. 03

    Install the SparkFun MAX3010x Arduino library from the Library Manager.

  4. 04

    Flash the Example5_HeartRate sketch. Place your fingertip lightly on the sensor.

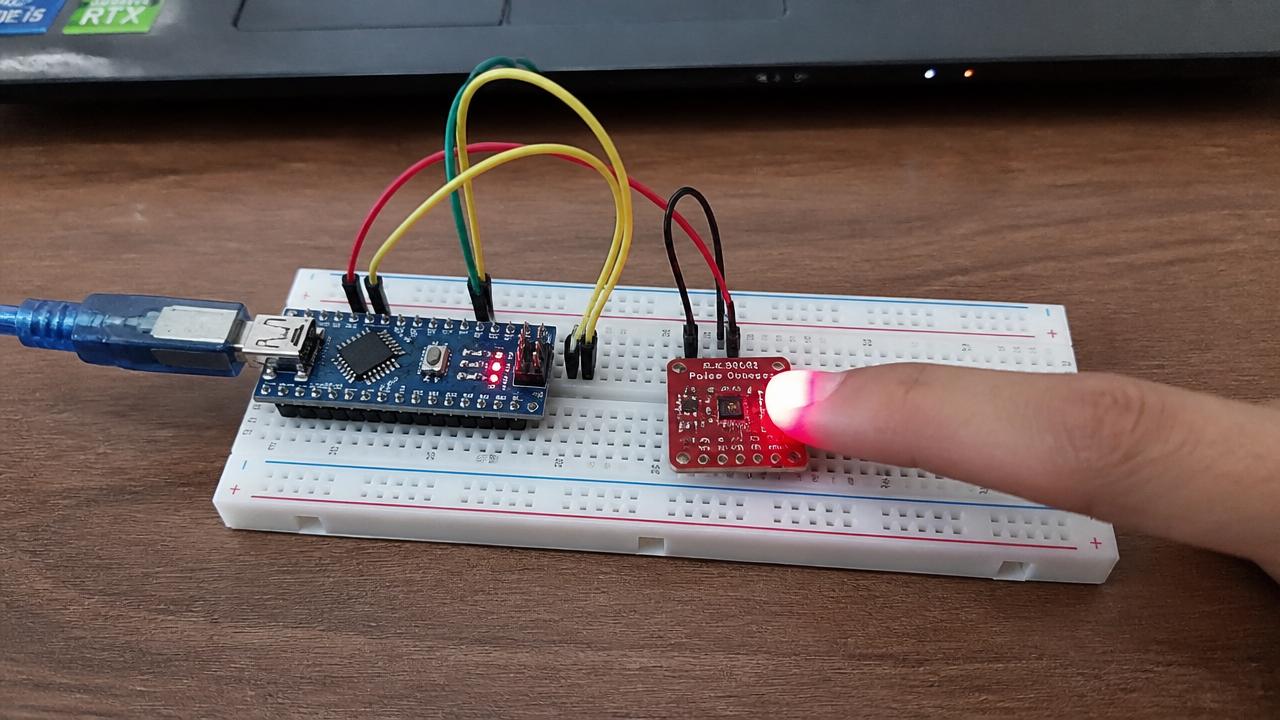
    MAX30102 lighting the fingertip red — PPG waveform streams to the laptop.
    MAX30102 lighting the fingertip red — PPG waveform streams to the laptop.
  5. 05

    Open Serial Plotter — you'll see your PPG waveform in real-time.

  6. 06

    Extend it: log to SD card, add a Bluetooth module, compute HRV (RMSSD) offline in Python.

Safety note

Low-voltage electronics. Not a medical device — do not use readings for diagnosis.

Culture your own gourmet mushroom mycelium — reference photo of equipment and materials
Safe
Applied mycology ≈ $40 2 weeks

Culture your own gourmet mushroom mycelium

Start pure oyster or lion's-mane cultures from a spore print on nutrient agar — the foundation of every mushroom-growing project.

Materials & alternatives

  • Spore source

    • Spore print (edible species only)
    • Spore syringe
    • Liquid culture from a trusted vendor
  • Nutrient medium

    • MEA — malt extract agar (classic, forgiving)
    • PDA — potato dextrose agar (broad-spectrum)
    • YMA — yeast malt agar (fast colonization)
    • DIY: light malt syrup + agar-agar + water

    Any 2% agar + carbon source will work; MEA is the gentlest for beginners.

  • Sterile petri dishes (100 × 15 mm, pre-sterilized plastic or reusable glass)

  • Pressure cooker (15 psi, 30 min for sterilization)

  • Still-air box (SAB)

    • Clear tote with two arm holes
    • HEPA-filtered flow hood (advanced)
  • Scalpel or inoculation loop

    Flame-sterilize between transfers.

  • Alcohol lamp or butane torch

  • Parafilm or micropore tape for sealing plates

Steps

  1. 01

    Order a spore syringe or print (Pleurotus ostreatus is the most forgiving).

  2. 02

    Prepare MEA (malt extract agar): 20 g malt extract, 20 g agar, 1 L water. Pressure cook at 15 psi for 30 min.

  3. 03

    Pour into sterile petri dishes in front of a still-air box or in a HEPA-filtered space.

  4. 04

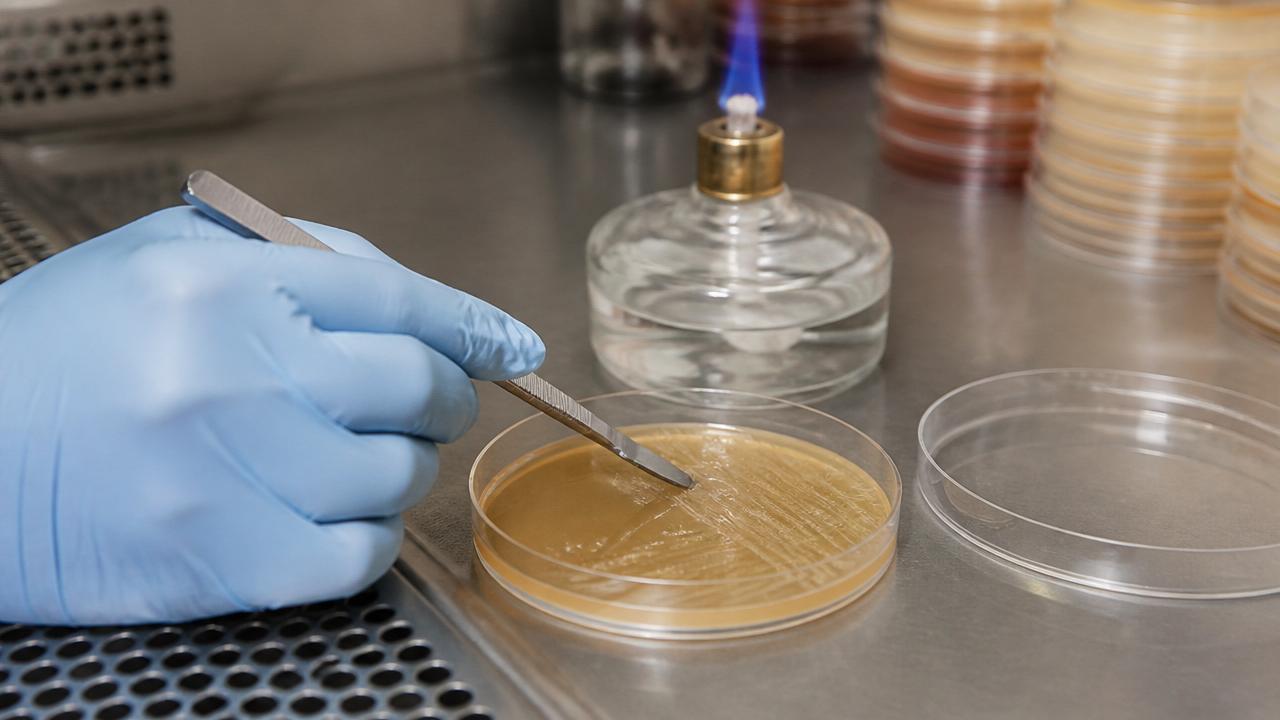
    Inoculate: streak a small amount from spore print onto agar with a flame-sterilized scalpel.

    Sterile inoculation near an alcohol lamp — the flame keeps airborne contaminants at bay.
    Sterile inoculation near an alcohol lamp — the flame keeps airborne contaminants at bay.
  5. 05

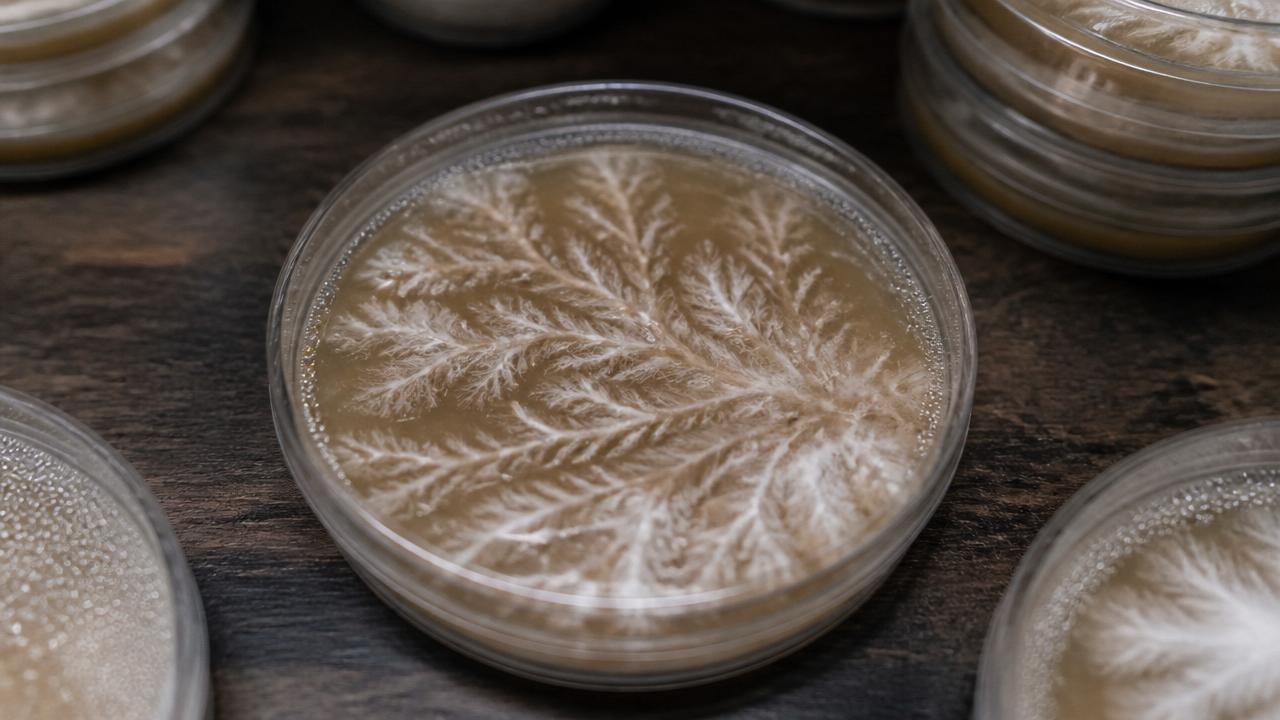
    Incubate at 22–25 °C. Rhizomorphic (thick, fluffy) growth means healthy mycelium.

    Healthy oyster mycelium — the fluffy, branching pattern you want.
    Healthy oyster mycelium — the fluffy, branching pattern you want.
  6. 06

    Once colonized, transfer wedges to grain jars to prepare for fruiting.

Safety note

Stick to well-documented edible/medicinal species. Never culture unknown environmental fungi indoors.

How semiconductor chips get made — a walkthrough (not a how-to) — reference photo of equipment and materials
Educational only
Educational deep-dive Educational — hobbyist fabs $10k+ Read: 1 hour

How semiconductor chips get made — a walkthrough (not a how-to)

An educational deep-dive into the physics of chip fabrication, not a project to attempt at home. The most advanced hobbyist fab (documented by an independent content creator) still cost $10k+ and used hydrofluoric acid.

Materials & alternatives

  • Reading list

    This is a concept walkthrough — no physical build. See kit sources for the linked writeups.

  • For a safe hands-on alternative

    • Tiny Tapeout — send a real ASIC design to a foundry for ~$150
    • SkyWater 130nm open PDK + OpenLane toolchain
    • Falstad circuit simulator (browser-based)

Steps

  1. 01

    Read the linked writeups documenting the most advanced known hobbyist semiconductor lab.

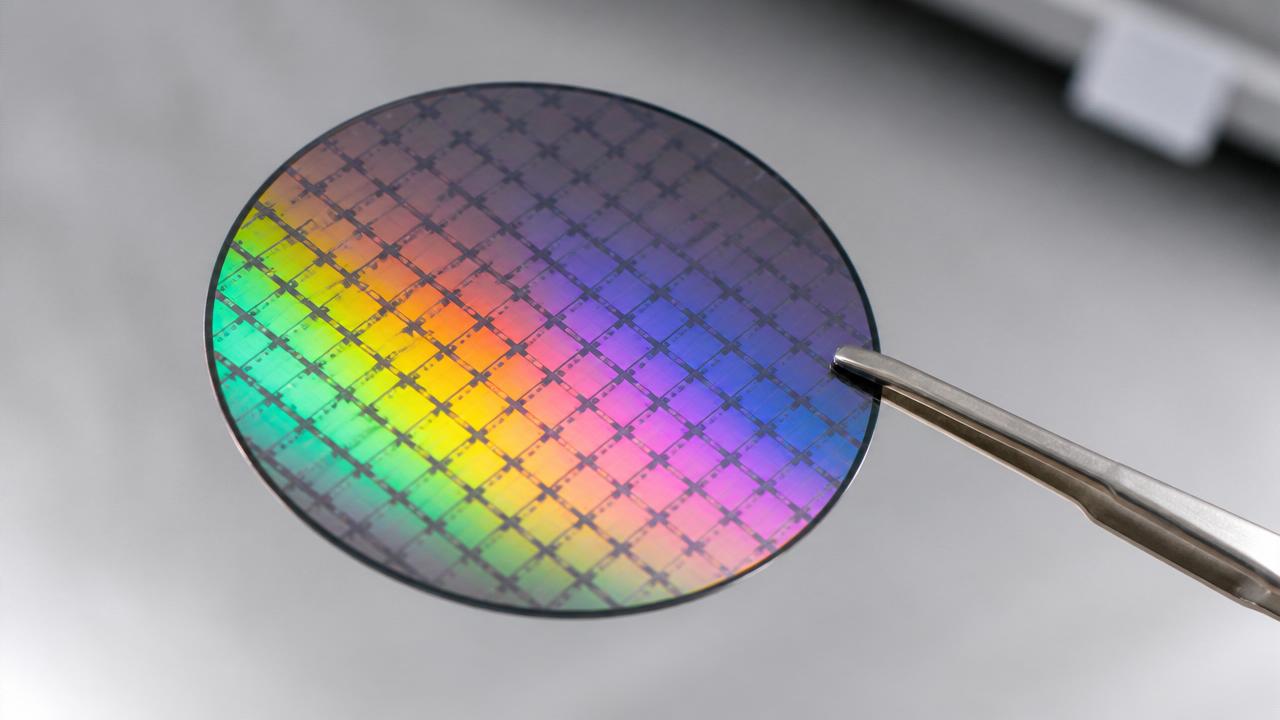
    A polished silicon wafer — the substrate every step is built on.
    A polished silicon wafer — the substrate every step is built on.
  2. 02

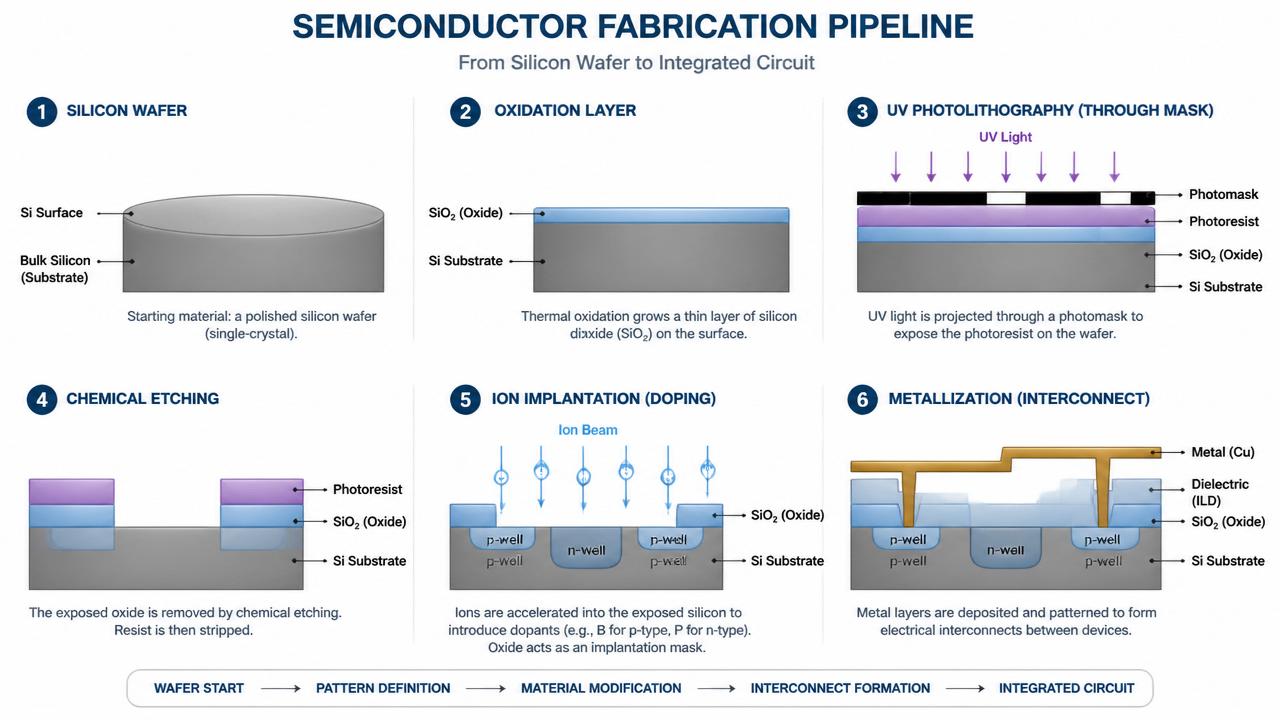
    Understand the pipeline: silicon wafer → oxidation → photolithography → etching → doping (ion implant or diffusion) → metallization.

    The six canonical stages of chip fabrication, cross-section view.
    The six canonical stages of chip fabrication, cross-section view.
  3. 03

    Photolithography step: UV light through a photomask transfers pattern to photoresist, then etchant removes the exposed silicon dioxide.

  4. 04

    Doping introduces controlled impurities (phosphorus for n-type, boron for p-type) to create transistor junctions.

  5. 05

    For hands-on chip design without fab risk: use the free open-source SkyWater 130nm PDK with a design like OpenLane to tape out a real ASIC design — the fab (via Tiny Tapeout, ~$150) is done for you.

Safety note

Real chip fabrication requires hydrofluoric acid (bone-dissolving), hazardous silane gas, high-voltage vacuum equipment, and cleanroom-grade air. Do not attempt in a residential space. This tutorial exists to teach the concepts, not to encourage unsafe home experiments.